Indoor Aloe Plant Care Tips
Aloe vera, with its spiky, succulent leaves, is not just a trendy plant to have indoors; it’s a powerhouse of benefits too. Known for its soothing gel, aloe barbadensis has been used for centuries for its medicinal properties. Whether you’re a seasoned plant enthusiast or a novice looking to bring some green leaves into your home, this comprehensive guide will walk you through everything you need to know about growing and caring for aloe vera. From aloe plant care indoor to the basics of nurturing your plant indoors and understanding the nuances of its outdoor life, this article is your go-to resource.
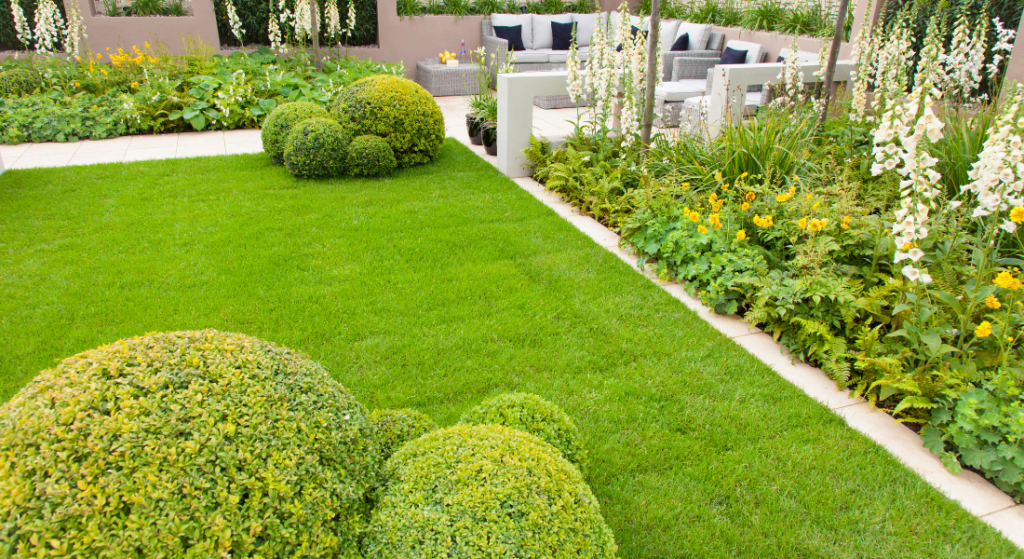
Plus, if you're passionate about maintaining a vibrant outdoor space, exploring lawn care services and professional lawn maintenance can help keep your garden thriving alongside your aloe vera.
Types of Aloe: Choosing the Right One for You
Aloe comes in various species, each with its unique characteristics. The most commonly known is aloe barbadensis , renowned for its gel-filled leaves and healing properties. However, there are over 500 species of aloe, including the striking aloe polyphylla and the robust aloe ferox.
When choosing an aloe plant, consider whether you want it primarily for indoor or outdoor cultivation. Aloe vera is a popular choice for indoor environments due to its adaptability to pot living. On the other hand, if you have a spacious garden and are looking for an ornamental succulent, exploring different aloe species could be fascinating.
Understanding the distinctions between aloe varieties ensures you select a plant that aligns with your preferences and living conditions.
Growing Aloe Indoors: A Green Companion Inside
One of the fantastic aspects of aloe is its suitability as an indoor plant. Growing aloe indoors requires minimal effort, making it an ideal choice for both seasoned plant parents and beginners.
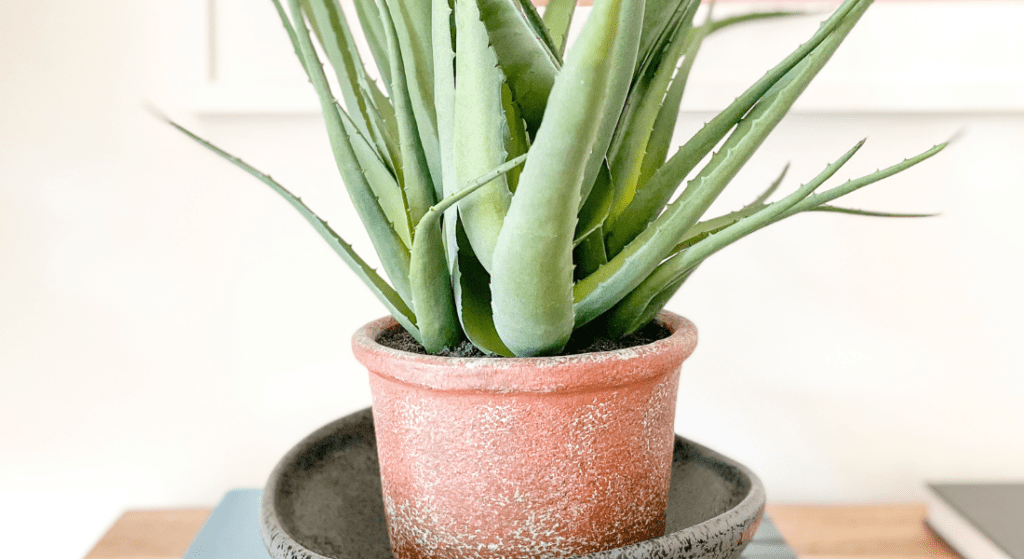
To plant aloe indoors, start with a well-draining potting mix, preferably a cactus mix. Aloe doesn’t enjoy sitting in water, so a mix that allows excess water to drain is crucial. Place your aloe in a pot with drainage holes, ensuring the base of the plant doesn’t stay wet for extended periods. While aloe barbadensis can tolerate some shade, it thrives in bright indirect light. A sunny windowsill or a spot with filtered sunlight is perfect for your indoor aloe. This versatile houseplant doesn’t demand much attention but rewards you with its vibrant green presence. Aloe plant care indoors is simple, requiring minimal intervention while still offering great visual appeal.
In addition to its low-maintenance nature, aloe’s aesthetic appeal contributes to its popularity as an indoor plant. Its striking, spiky leaves create an engaging landscape design within your living space, adding a touch of nature’s beauty to your indoor environment.
Watering Wisdom: Quenching Your Aloe’s Thirst
Understanding the water needs of your aloe plant is crucial for its overall health. Aloe vera is a succulent, storing water in its leaves, making it resilient and drought-tolerant, which allows it to withstand periods of drought. However, this doesn’t mean it’s entirely self-sufficient.
Water your aloe when the top inch of the soil is dry to the touch. Overwatering is a common issue that can lead to root rot, a condition that can be fatal for your plant. Allow the soil to dry out between waterings, and always use well-draining pots to prevent water accumulation.
Remember, aloe vera is a plant that thrives on neglect, so it’s better to underwater than overwater. Observing your plant’s leaves is a good indicator; if they become thin and curled, it might be time to give your aloe a drink.
Aloe Vera Care 101: Nurturing Your Plant to Maturity
Caring for a mature aloe plant involves a few essential practices. First and foremost, ensure your aloe gets adequate sunlight. If grown indoors, place it near a window with indirect light. Outdoors, find a spot with partial shade to protect it from intense sunlight.
Healthy aloe leaves are firm and upright. If you notice them becoming mushy or changing color, it’s a sign of potential issues. Aloe rust, a common fungal disease, can cause reddish-brown spots on the leaves. To prevent this, avoid overwatering, provide proper ventilation, and use well-draining soil.
Regularly remove dead or damaged leaves to encourage new growth. As your aloe matures, you may notice offsets or “pups” forming at the base. These can be carefully separated and replanted to expand your aloe family.
Harvesting Aloe Vera: Turning Leaves into Gold
Harvesting aloe vera is a straightforward process that involves cutting mature leaves for various uses. Wait until your aloe plant is at least three years old before harvesting, ensuring the leaves are robust and filled with gel.
To harvest, choose the outermost leaves and use a sharp, clean knife to cut them close to the base. Be mindful not to damage the surrounding leaves. Once harvested, you can extract the gel by slitting the leaf open and scooping it out.
Aloe gel is a versatile substance with numerous benefits. It’s commonly used for skin care, treating burns, and even as a nutritional supplement. Incorporating freshly harvested aloe gel into your routine can provide a natural boost of nutrition and hydration.
Propagation and Repotting: Expanding Your Aloe Family
If you want to multiply your aloe plants or give them more space to grow, propagation and repotting are essential steps. Propagating aloe vera is relatively simple; you can do it by separating offsets from the mother plant or by growing aloe vera from seeds.
When repotting, choose a larger pot with proper drainage. Gently remove the aloe from its current pot, taking care not to damage the roots. Place it in the center of the new pot and fill the gaps with fresh potting soil. Water sparingly in the first few weeks to allow the plant to adjust.
Proper drainage is crucial during repotting to prevent waterlogging, which can lead to root rot. A well-established aloe vera plant can be repotted every 2-3 years to ensure it has enough space to thrive.
Types of Aloe: Choosing the Right One for You
Aloe comes in various species, each with its unique characteristics. The most commonly known is aloe vera, renowned for its gel-filled, fleshy leaves and healing properties. However, there are over 500 species of aloe, including the striking spiral aloe and the robust aloe ferox.
When choosing an aloe plant, consider whether you want it primarily for indoor or outdoor cultivation. Aloe vera is a popular choice for indoor environments due to its adaptability to pot living. On the other hand, if you have a spacious garden and are looking for an ornamental succulent, exploring different aloe species could be fascinating.
Understanding the distinctions between aloe varieties ensures you select a plant that aligns with your preferences and living conditions.
Watering Wisdom: Quenching Your Aloe’s Thirst
Understanding the water needs of your aloe plant is crucial for its overall health. Aloe vera is a succulent, storing water in its leaves, making it resilient to periods of drought. However, this doesn’t mean it’s entirely self-sufficient.
Water your aloe when the top inch of the soil is dry to the touch. Overwatering is a common issue that can lead to root rot, a condition that can be fatal for your plant. Allow the soil to dry out between waterings, and always use well-draining pots to prevent water accumulation.
Remember, aloe vera is a plant that thrives on neglect, so it’s better to underwater than overwater. Observing your plant’s leaves is a good indicator; if they become thin and curled, it might be time to water the plant.
Aloe Vera Outdoors: Thriving in the Open Air
While aloe vera is well-suited for indoor living, it can also thrive outdoors under the right conditions. If you decide to transition your indoor aloe to the outdoors, do it gradually to acclimate the plant to the increased sunlight and different environmental conditions.
Choose a location with well-draining soil and partial shade, especially in regions with intense sunlight. Aloe vera can tolerate drought, but it’s essential to water it during dry spells. Outdoor aloe plants may require more frequent watering than their indoor counterparts.
Protect your outdoor aloe from extreme weather conditions, such as frost, as aloe vera is sensitive to cold temperatures. With proper care, your aloe can flourish in an outdoor setting, contributing its unique aesthetic to your garden.
Aloe Varieties: Exploring the Diversity of Aloe Plants
Beyond the familiar aloe vera, there is a diverse world of aloe varieties to explore. Some notable ones include the spiral aloe (Aloe polyphylla) with its mesmerizing rosette pattern and the aloe ferox, known for its medicinal properties.
Each variety has its own set of characteristics and care requirements. For example, the spiral aloe prefers well-draining soil and a sunny location with protection from harsh afternoon sun. Aloe ferox, often called bitter aloe, is valued for its medicinal sap and requires well-draining soil in a sunny spot.
Exploring different aloe varieties can add variety and interest to your plant collection. Learning about their unique features and adapting your care routine accordingly ensures a thriving and diverse aloe garden.
Conclusion: Aloe Happiness, Indoors and Outdoors
In conclusion, aloe vera is a delightful addition to any home or garden. Whether you choose to grow it indoors or outdoors, caring for aloe plants indoors , understanding its specific needs, and providing proper care ensures a healthy and vibrant plant. From selecting the right type of aloe to harvesting its gel and exploring various varieties, this comprehensive guide has covered every aspect of growing and caring for aloe vera.
As you embark on your aloe journey, remember to enjoy the process. Aloe vera is a resilient and forgiving plant, making it an excellent choice for both beginners and experienced plant enthusiasts. Share your aloe experiences with fellow enthusiasts, and let the green beauty of aloe vera bring joy and wellness into your life.
Key Takeaways
- Choose the right type of aloe based on your preferences and living conditions.
- Indoors, provide well-draining potting soil, indirect light, and occasional watering.
- Water your aloe when the top inch of the soil is dry to prevent overwatering.
- Ensure proper care for a mature aloe, including sunlight, ventilation, and addressing issues like aloe rust.
- Harvest aloe vera leaves when mature for various uses, including skincare and nutrition.
- Propagate and repot aloe to expand your collection and ensure healthy growth.
- Transitioning aloe plant outdoors requires acclimatization to sunlight and protection from extreme weather.
- Explore diverse aloe varieties, each with its own unique features and care requirements.
FAQ: Addressing Common Aloe Conundrums
Q: Why are the leaves of my aloe plant turning brown?
A: Brown leaves can be a sign of overwatering or exposure to cold temperatures. Ensure proper drainage and protect your aloe from extreme cold.
Q: How can I prevent my aloe from becoming leggy?
A: Provide adequate sunlight, rotate your aloe regularly to promote even growth, and avoid overwatering, which can lead to weak, elongated stems.
Q: Can I use aloe vera on my skin every day?
A: Yes, aloe vera gel is gentle and can be used daily for various skincare purposes, including moisturizing and soothing irritated skin.
